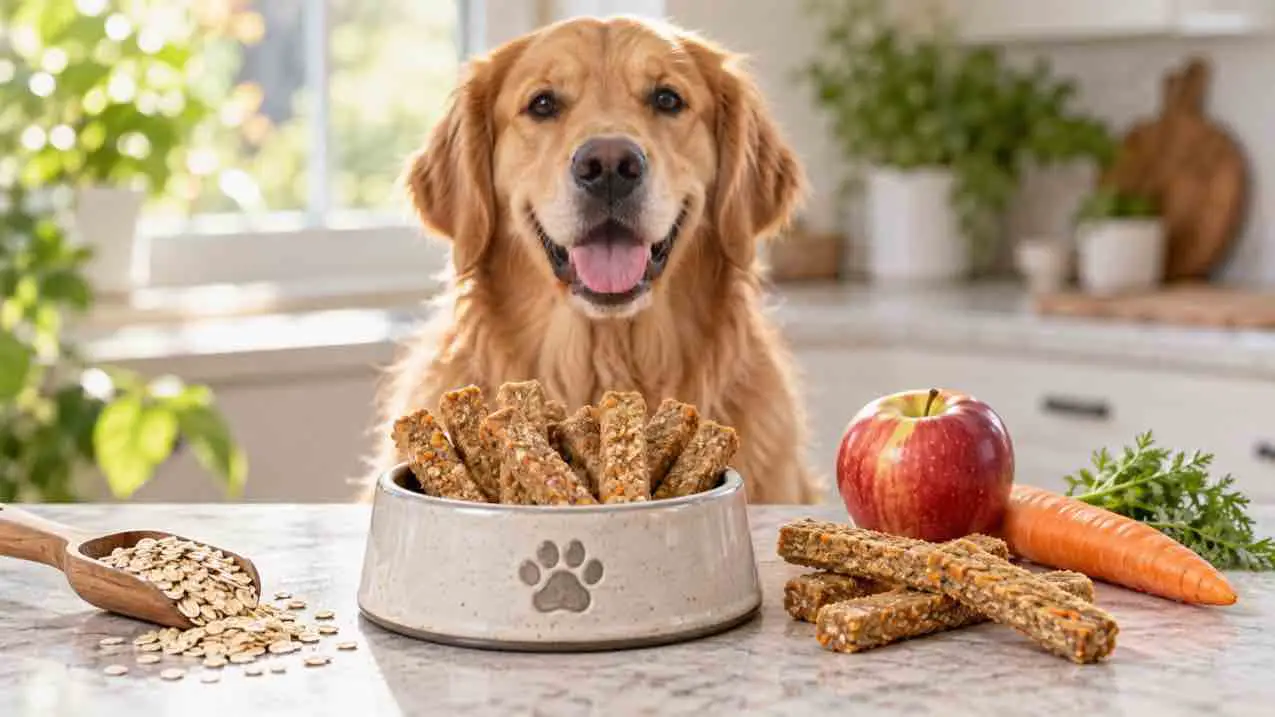
These homemade apple carrot dog treat sticks turn a handful of familiar ingredients into crisp, portionable rewards. Fresh apple provides a little natural sweetness, carrot adds color and texture, and oat flour creates an easy-to-handle dough without added sugar or salt.
Although treats of this shape are sometimes described as “chew sticks,” these are baked dog biscuits. They are not long-lasting chews or dental products. Always choose an appropriate size for your dog, supervise your dog while eating, and break the sticks into smaller pieces when necessary.
This recipe uses fresh apple and carrot rather than sweetened applesauce or flavored ingredients. It contains no peanut butter, honey, cinnamon, sugar, or unnecessary seasonings.
The apple must be washed, cored, and completely free of seeds and stem before it is grated.
Why You’ll Love These Apple Carrot Dog Treat Sticks
Making dog treats at home gives you more control over the ingredients that go into your dog’s snacks.
These apple carrot dog treat sticks are:
- Made with just five simple ingredients
- Free from added sugar and salt
- Easy to break into smaller portions
- Suitable for baking until firm or slightly crisp
- Naturally flavored with fresh apple and carrot
- Convenient to freeze for later
Serve them as an occasional treat or reward rather than as a replacement for your dog’s complete and balanced everyday food.
The exact yield and cooking time will depend on the moisture in the produce, the amount of additional oat flour used, the thickness of the dough, and the dimensions of each stick.
Why This Recipe Works
Apples and carrots naturally contain different amounts of moisture, and some apples are much juicier than others. That variation can noticeably affect the consistency of homemade dog treat dough.
Finely grating the apple and carrot, then gently pressing out any loose juice, helps keep the mixture from becoming overly wet.
Oat flour also continues to absorb moisture after mixing. Letting the dough rest for about five minutes before making any adjustments gives the flour time to hydrate. This helps prevent you from adding too much extra flour and ending up with dry, crumbly treats.
The egg helps bind the ingredients together, while a small amount of canola oil improves the texture and helps reduce crumbling.
The sticks are first baked at a moderate temperature to set their shape and fully cook the egg. If you want a firmer, crispier biscuit, you can then use an optional low-temperature drying stage.
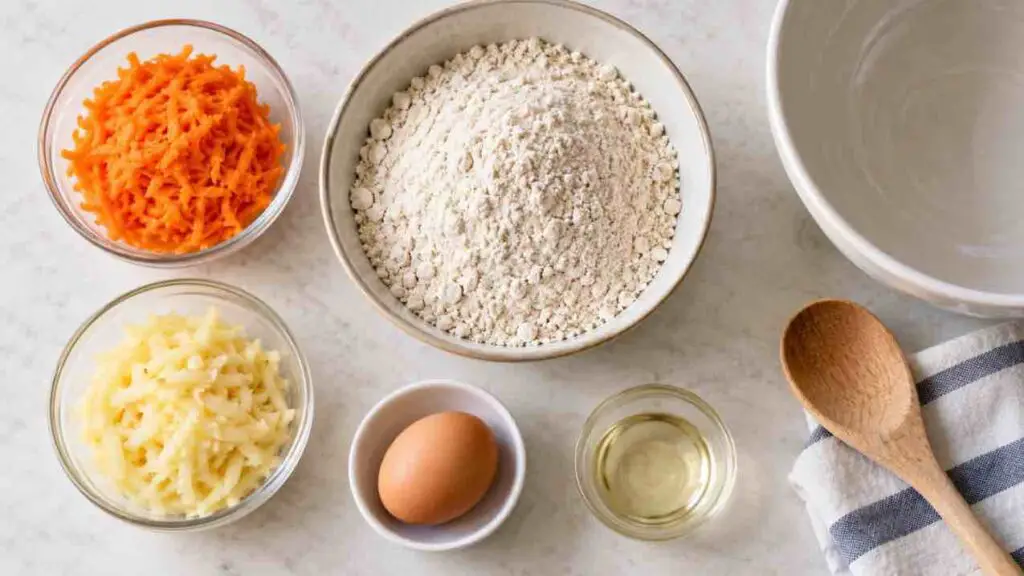
Measure the apple after removing the core, seeds, and stem and after gently pressing out loose juice.
Use plain oat flour rather than flavored oatmeal, instant oatmeal packets, or sweetened baking mixes.
If making oat flour at home, process plain rolled oats in a blender or food processor until they have a fine, flour-like consistency. For the most predictable result, weigh the finished flour rather than relying only on cup measurements.

Ninja Professional Plus Food Processor
Quickly turn plain rolled oats into oat flour and use the shredding disc to prepare the apple and carrot. It is a useful time-saving appliance for dog parents who regularly make homemade treats.
Choosing and Preparing the Apple
Choose a fresh apple without mold, fermentation, or spoiled areas.
Wash it thoroughly. Peeling is optional, but a peeled apple will produce a smoother dough and more uniform treat.
Remove:
- The entire core
- Every apple seed
- The stem
- Any bruised or spoiled areas
Do not grate the apple whole.
After grating, place the apple in a clean kitchen towel or several layers of paper towel. Press gently to remove loose surface juice.
Do not squeeze until the apple becomes completely dry. Some moisture is necessary to form the dough.
Measure ½ cup or approximately 60 grams after gently pressing.
Preparing the Carrot
Wash and peel the carrot.
Finely grate it so that the pieces distribute evenly throughout the dough. Large carrot pieces can make the sticks difficult to cut and may create weak areas that break after baking.
Gently press the grated carrot with a clean towel to remove obvious surface moisture. Measure ½ cup or approximately 55 grams after pressing.
How to Make Apple Carrot Dog Treat Sticks
Step 1: Prepare the oven and pan
Preheat your oven to 325°F or 165°C.
Cut a sheet of parchment paper that fits your baking sheet. Place it on your work surface for rolling and cutting the dough.
Rolling directly on the parchment makes transferring the shaped sticks easier.
Step 2: Combine the wet ingredients
Crack the egg into a large mixing bowl.
Add the canola oil and whisk until combined.
Stir in the prepared apple and carrot. Mix until the produce is evenly distributed.
Step 3: Add the oat flour
Add 2 cups or approximately 184 grams of oat flour.
Mix with a sturdy spoon until no dry pockets of flour remain. Use clean hands to bring the mixture together into a rough dough.
The dough may initially feel slightly sticky. Do not immediately add more flour.
Step 4: Rest the dough
Allow the dough to rest in the bowl for five minutes.
This short resting period gives the oat flour time to absorb moisture from the egg, apple, and carrot.
After resting, the dough should feel soft and pliable but should not stick heavily to your fingers. Its texture should resemble soft modeling clay.
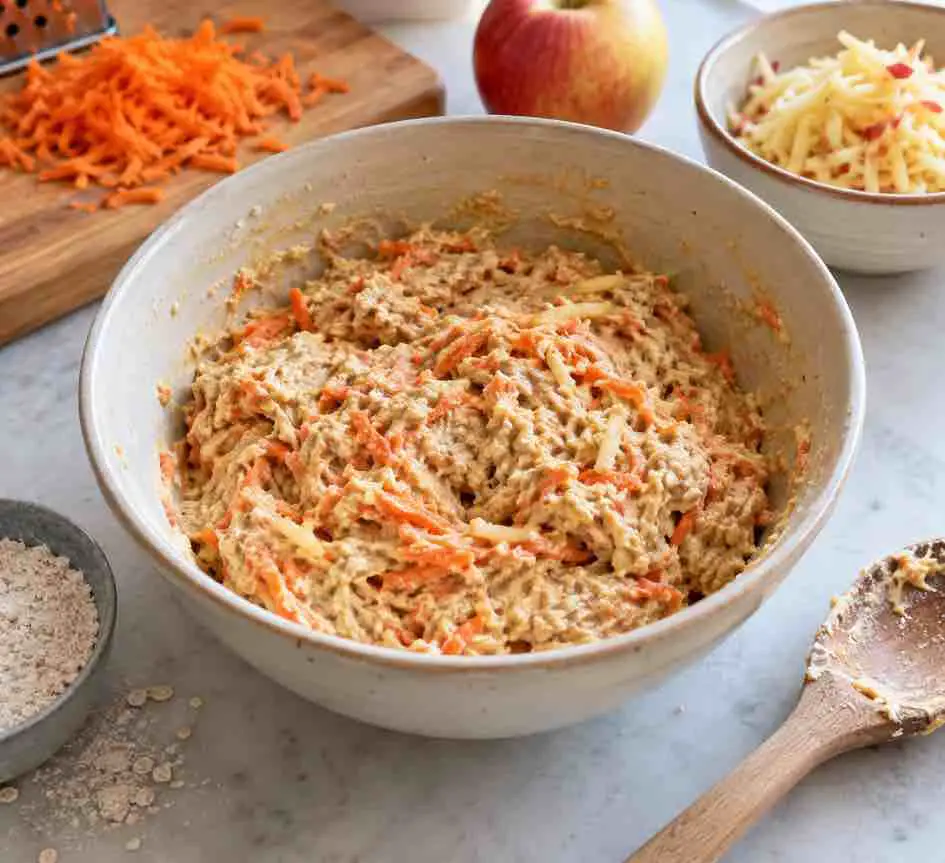
Step 5: Adjust the consistency
If the dough remains wet or difficult to handle after resting, add oat flour 1 tablespoon at a time.
Knead briefly after every addition. Use no more than approximately ¼ cup of additional oat flour.
If the dough is dry, cracks when pressed, or will not hold together, add water 1 teaspoon at a time.
Knead after every addition and stop adding water as soon as the dough becomes smooth and workable.
You may not need any additional flour or water.
Avoid adding large quantities at once. Gradual adjustments are the key to producing a dough that rolls cleanly without becoming dry.
Step 6: Roll the dough
Place the dough on the prepared parchment paper.
Cover it with a second sheet of parchment and roll it into a rectangle approximately ¼ inch or 6 millimeters thick.
Check several areas to make sure the thickness is reasonably even. Thin edges will bake faster than a thick center.
Remove the top sheet of parchment.
Step 7: Cut the sticks
Use a pizza wheel, bench scraper, or sharp knife to cut the dough into strips approximately:
- ½ inch wide
- 3–4 inches long
- ¼ inch thick
These dimensions should produce approximately 40–50 slim sticks. The exact number will vary because homemade pieces are rarely identical.
Cut shorter pieces for small dogs or dogs that need smaller treats.
Gently separate the sticks on the parchment, leaving a small space between them. A bench scraper or thin spatula can help move them without stretching the dough.
Slide the parchment paper with the prepared sticks directly onto the baking sheet.
Step 8: Bake the sticks
Place the baking sheet on the center rack of the preheated oven.
Bake for 15–20 minutes.
Rotate the entire baking sheet so that the treats bake evenly. There is no need to turn every individual stick.
Continue baking for another 15–20 minutes.
The total initial baking time should be approximately 30–40 minutes.
Begin checking the sticks at 30 minutes. They should appear dry and set, with lightly golden edges and no visible raw dough.
Thin pieces or sticks near the edges of the pan may finish sooner. Remove individual pieces if necessary and allow thicker sticks to continue baking.
Step 9: Dry the sticks if desired
For slightly softer biscuits, remove the treats after the initial baking stage once they are fully set and show no raw or gummy center.
For firmer and crispier sticks, reduce the oven temperature to 200°F or 95°C.
Dry the treats for an additional 30–60 minutes. Rotate the baking sheet halfway through the drying time.
Begin checking after 30 minutes.
Thin sticks may need only 30 minutes, while thicker or wetter pieces may require closer to 60 minutes.
The treats will continue to firm as they cool, so avoid baking them until they become extremely hard.
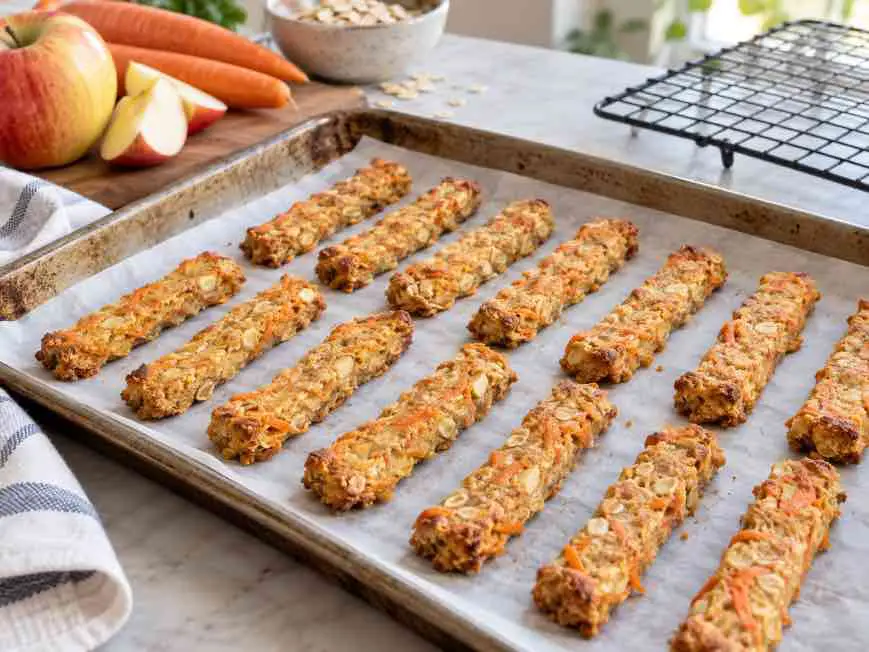
Step 10: Cool completely
Transfer the finished sticks to a wire cooling rack.
Allow them to cool completely for approximately 45 minutes before serving or storing.
Never seal warm treats inside a container. Trapped steam can create condensation and encourage spoilage.
How to Check for Doneness
Baking time is a guide. The final texture provides a more reliable indication of doneness.
Choose one of the thickest sticks and allow it to cool for several minutes. Break it open and inspect the center.
A properly baked stick should have:
- A dry surface
- Firm edges
- A cooked, set center
- No gummy or raw-looking dough
- No visible wet areas
A treat intended to remain slightly soft may bend a little, but its center should still be fully cooked.
If the center looks damp, gummy, or bread-like, return the batch to a 200°F oven. Continue drying in 15-minute intervals.
Remember that the sticks will feel softer when hot and become firmer during cooling.
Expected Yield
When the dough is rolled approximately ¼ inch thick and cut into strips measuring about ½ inch wide and 3–4 inches long, the recipe should produce approximately 40–50 sticks.
The yield may change if:
- Additional oat flour is required
- The dough is rolled thicker or thinner
- The sticks are cut wider or narrower
- Some dough remains on the bowl or rolling paper
- Smaller training pieces are made
For a professional and honest recipe, the yield should remain approximate rather than being presented as a guaranteed number.
Estimated Calories
The complete recipe contains approximately 980–1,080 calories, depending on the oat flour, egg, oil, produce, and amount of additional flour used.
If the batch produces 40–50 similar-sized sticks, each treat contains approximately 20–27 calories.
This is a calculated estimate and not laboratory nutritional analysis.
Cutting the treats into smaller pieces makes it easier to manage your dog’s daily calorie intake.
Conservative Serving Guide
Introduce any new treat gradually.
Treats, chews, table food, toppers, and other extras should generally provide no more than 10% of a dog’s total daily calories. Most calories should come from complete and balanced dog food.
Ask your veterinarian to recommend an appropriate treat allowance if your dog is very small, overweight, underweight, growing, pregnant, nursing, highly active, elderly, or managing a medical condition.
Are Apples Safe for Dogs?
Plain apple flesh is generally safe for most healthy dogs when offered in moderation.
The apple’s seeds, core, and stem should be removed before it is included in a dog-treat recipe.
Apples contain natural sugar and fiber. Large servings may cause digestive discomfort, especially in dogs that are not accustomed to eating fruit.
Dogs with diabetes or another condition affected by dietary sugar should receive veterinary approval before eating apple-based treats.
Are Carrots Safe for Dogs?
Plain carrots are generally considered dog-friendly when served in reasonable amounts.
They contribute natural color and texture without requiring added sugar.
However, carrot-based treats still need to be appropriately sized. Hard or oversized pieces may be unsuitable for small dogs, dogs with painful teeth, or dogs that swallow food quickly.
Important Safety Notes
- Remove the apple’s core, stem, and every seed.
- Use only plain ingredients.
- Do not add sugar, salt, butter, honey, nutmeg, raisins, grapes, chocolate, onion, or garlic.
- Never use xylitol or any product that may contain xylitol.
- These treats are not complete and balanced meals.
- They should not replace your dog’s regular food.
- These sticks are not dental products or long-lasting chews.
- A firm biscuit may damage a weak, diseased, or painful tooth.
- Any treat can become a choking hazard.
- Supervise your dog while it is eating.
- Break the sticks into small pieces for dogs that gulp food.
- Do not give hard treats to a dog with dental disease or recent oral surgery unless your veterinarian approves them.
- Introduce the treats gradually.
- Stop serving them if your dog develops vomiting, diarrhea, itching, swelling, or another unusual symptom.
Consult your veterinarian before feeding these treats to a dog with diabetes, pancreatitis, chronic gastrointestinal disease, kidney disease, obesity, food allergies, or a medically prescribed diet.
Do not use this recipe if your dog has a diagnosed oat or egg allergy.
How to Store the Treats
Let the sticks cool completely before storing them.
Place the treats in an airtight container lined with a clean, dry paper towel. Refrigerate for up to five days.
Refrigerated treats may soften slightly as they absorb moisture. A small change in crispness does not necessarily indicate spoilage.
Replace the paper towel if it becomes damp.
For longer storage, place the cooled sticks in a freezer-safe container and freeze them for up to two months.
Separate layers with parchment paper so individual treats are easy to remove. Thaw the required portion in the refrigerator before serving.
Discard treats that develop:
- Mold
- A sour or unpleasant smell
- Suspicious discoloration
- A sticky or slimy surface
- Visible condensation
- Other signs of spoilage
Do not depend on a long room-temperature shelf life. Moisture levels in homemade treats vary according to the produce, thickness, baking time, drying time, oven accuracy, and local humidity.
Troubleshooting
The dough is still sticky after resting
Add oat flour 1 tablespoon at a time, kneading after each addition.
Stop as soon as the dough can be rolled without sticking heavily. Adding too much flour may produce dry, crumbly treats.
The dough breaks apart
Add water 1 teaspoon at a time and knead after every addition.
The dough is ready when it holds together cleanly when pressed.
The dough is difficult to cut
Chill it for 10–15 minutes, then try again.
Do not chill it for a long period because very cold oat dough may crack while rolling.
The edges brown before the centers are set
The dough may be unevenly rolled, or the oven may run hot.
Remove thinner pieces that are already finished. Reduce the oven temperature slightly and allow thicker pieces to continue baking.
The treats become soft in storage
Homemade treats can absorb moisture in the refrigerator.
If the treats smell fresh and show no signs of spoilage, the softer texture is not necessarily a safety problem. Use them promptly and keep them refrigerated.
Never attempt to rescue treats that show mold, suspicious discoloration, or an unpleasant odor.
Frequently Asked Questions
Can I use applesauce instead of fresh apple?
Applesauce is not a dependable one-for-one substitution in this recipe.
Its moisture content varies, and some products contain added sugar, spices, artificial sweeteners, or other ingredients.
Fresh grated apple provides the intended texture and moisture.
Can I use rolled oats instead of oat flour?
Plain rolled oats can be ground into oat flour using a blender or food processor.
Process them until they have a fine, flour-like texture. Large oat pieces may prevent the dough from holding together properly.
Are these treats gluten-free?
Oats are naturally gluten-free, but cross-contact with gluten-containing grains may occur during processing.
If gluten avoidance is important, use oat flour specifically labeled gluten-free and consult your veterinarian about medically necessary dietary restrictions.
Will these sticks clean my dog’s teeth?
No. These are homemade baked biscuits, not approved dental products.
Their firm texture does not mean they will remove plaque, control tartar, or prevent dental disease.
Brushing with dog-safe toothpaste and following your veterinarian’s dental recommendations are more dependable ways to protect your dog’s teeth.
Can puppies eat them?
A healthy puppy already eating solid food may be able to have a tiny, softened piece if its veterinarian approves.
Treats must not displace the complete puppy food required for healthy growth.
Hard sticks may be unsuitable for teething puppies or puppies that swallow food quickly.
Can senior dogs eat them?
That depends on the dog’s teeth, chewing ability, diet, and medical condition.
Senior dogs with missing teeth, dental disease, diabetes, kidney disease, gastrointestinal problems, or prescription diets should receive veterinary approval first.
If your veterinarian approves the ingredients but recommends a softer texture, soften a small piece with warm water before serving.
Final Thoughts
Homemade apple carrot dog treat sticks are a simple way to prepare an occasional snack using recognizable ingredients.
The most important steps are completely removing the apple core and seeds, controlling the moisture in the grated produce, allowing the oat flour to hydrate, adjusting the dough gradually, and checking the center of a cooled treat before storage.
When rolled and cut according to the stated dimensions, the recipe should produce approximately 40–50 slim sticks. Because apples, carrots, ovens, and hand-cut dimensions vary, both the yield and cooking time should be treated as reasonable ranges rather than guaranteed numbers.
Serve appropriately sized portions, supervise your dog, and count the treats as part of your dog’s daily calorie allowance.
Veterinary Disclaimer
This recipe and article provide general educational information and are not substitutes for professional veterinary advice.
Every dog has different nutritional, dental, and medical requirements. Consult your veterinarian before introducing a new treat or changing your dog’s diet, particularly if your dog has a medical condition, food intolerance, dental problem, or medically prescribed diet.
Checkout Our Favorite Dog Products
1. BEST PUPPY TOY
We Like: Snuggle Behavior Toy with Heart Beat & Heat Pack – Ideal toy for new puppies.
2. BEST DOG TRAINING PROGRAM
We Like: Doggy Dan The Online Dog Trainer – Stop any dog problem and raise the perfect puppy with The Online Dog Trainer.
3. BEST DOG DNA TEST
We Like: Embark Dog DNA Test – Embark screens for over 250 dog breeds + tests for 170+ genetic diseases including MDR1 drug sensitivity, glaucoma, degenerative myelopathy, and dilated cardiomyopathy, some of the most common adult-onset diseases in dogs.
4. BEST DOG PUZZLE TOY
We Like: Outward Hound Interactive Puzzle Toy – Every dog loves chasing squirrels at the park. The Outward Hound Hide-a-Squirrel Puzzle Toy gives your dog the same feeling as though he was outdoors chasing live squirrels.
5. Best Calming Treats for Dogs
We Like: FurroLandia Hemp Calming Treats – These soft chews will calm your dog so it can peacefully endure stressful situations, such as long car trips, visiting unfamiliar places, or hearing Thunder. Ideal for all dog breeds & sizes.